Step 1 — Open Domain Resellerguru Website
Go to: domainresellerguru.com
You will see the domain search section on the homepage.
Step 2 — Enter Your Domain Name In Search Box
Example:yourwebsitename
(Do not add https:// Or www)
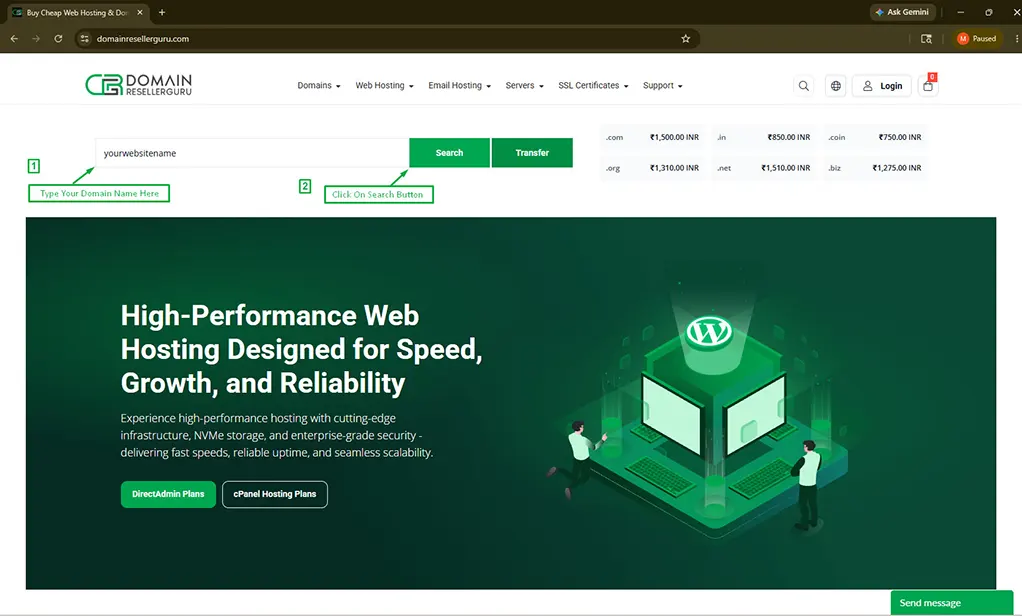
Step 3 — Click the Search Button
Click the green Search button to check availability.
If your domain is available, you will see a message similar to:
yourwebsitename.com is available.
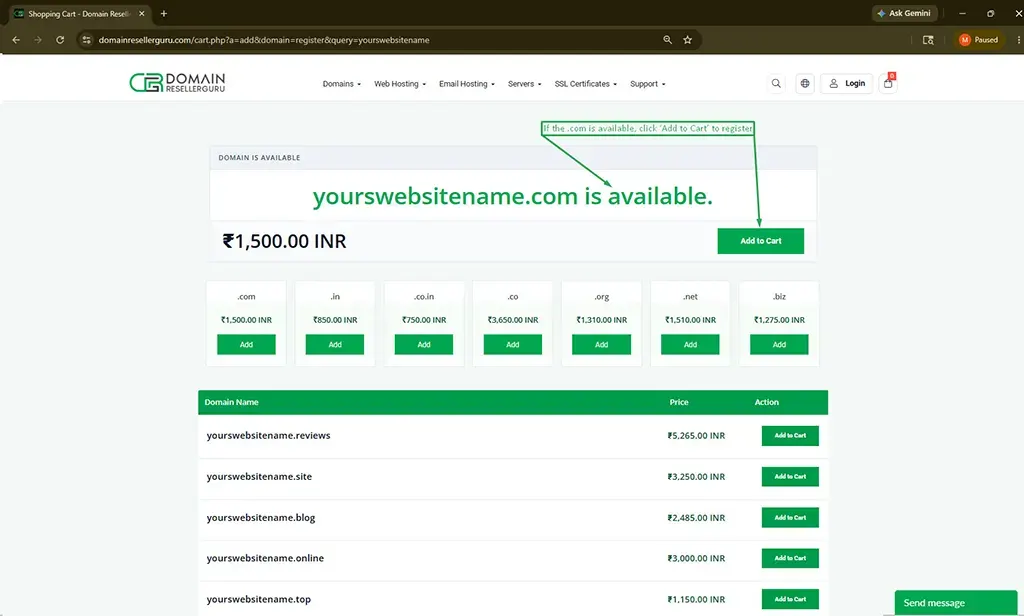
Step 4 — Proceed with Domain Registration
You should also check the domain price because pricing varies depending on the domain extension (.com, .in, .net, .org, etc.).
After comparing the prices, you can click on “Add to Cart” to purchase and register the domain.
If the domain is already registered by someone else, you will see a message like:
yourwebsite.com is unavailable.

Try another domain name or choose another available extension such as:
- yourwebsitename.in
- yourwebsitename.org
- yourwebsitename.online
- yourwebsitename.site
Then click on “Add to Cart” to continue.
Step 5 — Proceed with Checkout
If you do not want to search for more domain variations, click the “Checkout” button.
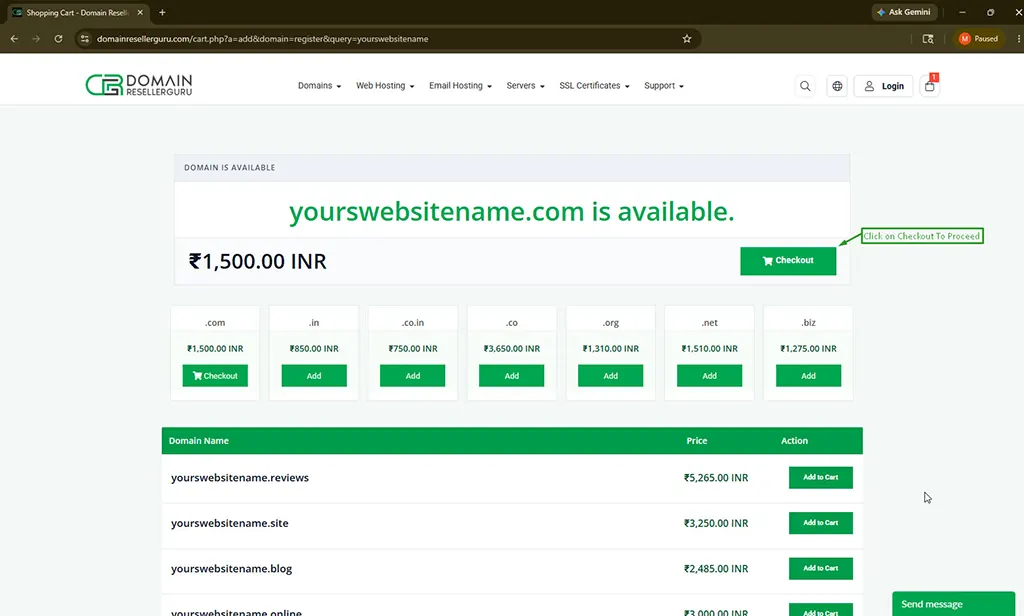
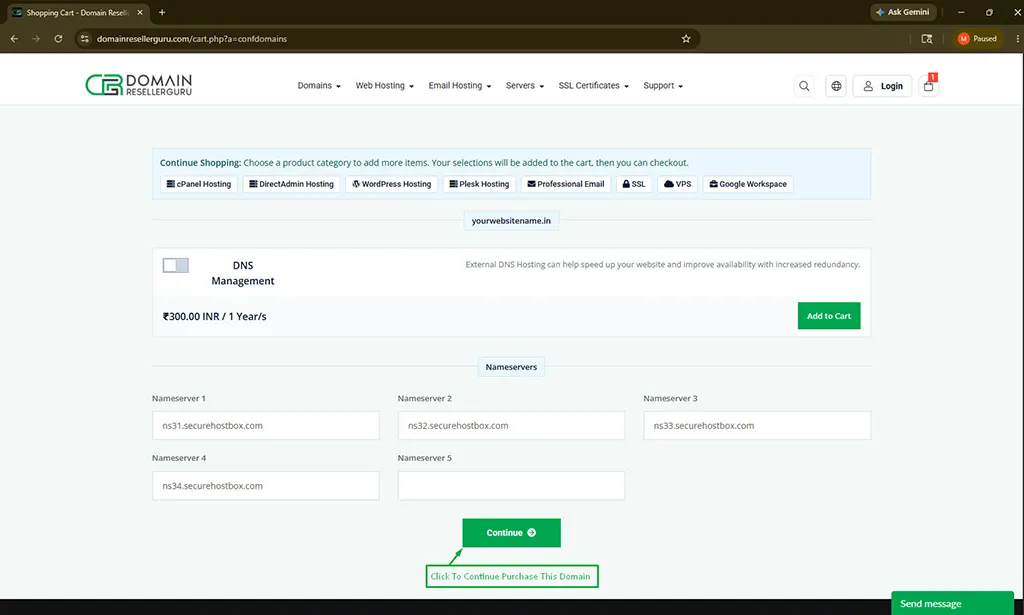
Step 6 — Continue Without Hosting or Add-ons
If you do not want to purchase a hosting package or any add-ons for this domain, click the “Continue” button.
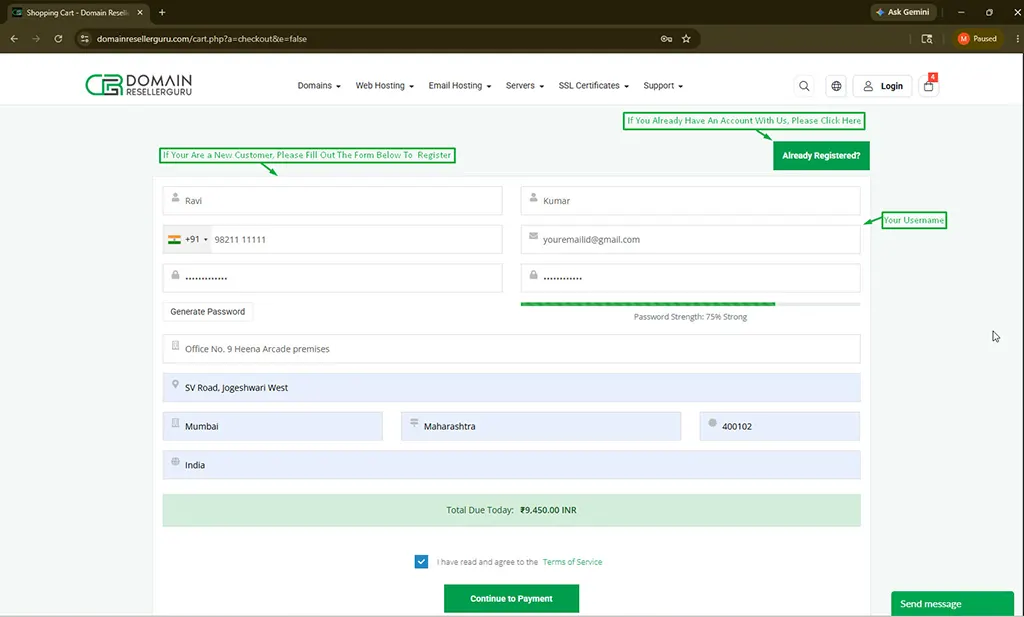
Step 7 — New Customer or Existing Customer
- New customer? Fill in your details.
- Already registered? Click “Already Registered”.
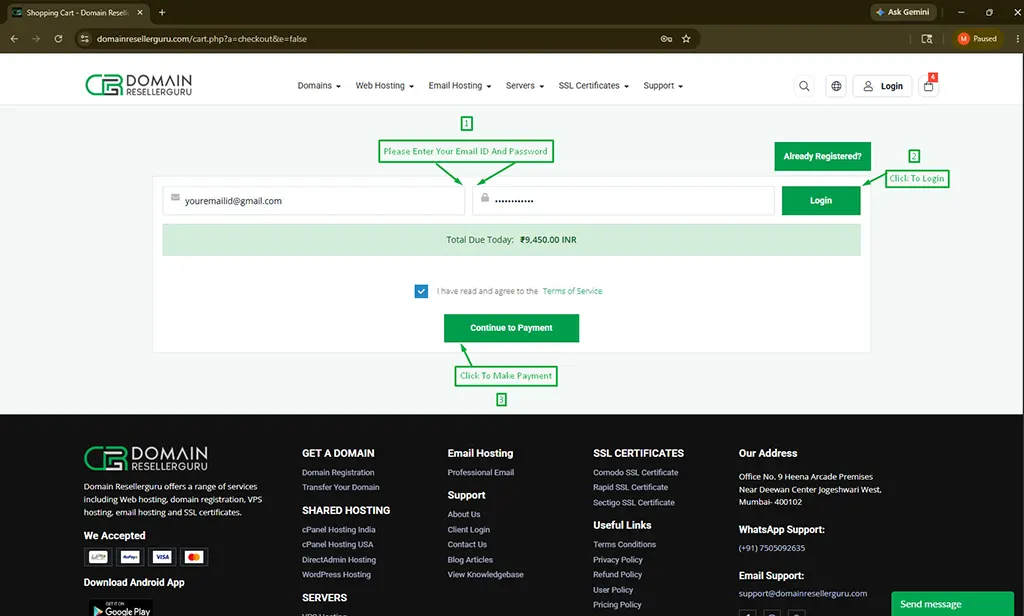
Step 7.1 — Login To Continue
After clicking the “Already Registered” button, the login form will appear.
Enter your registered Email ID and Password, then click the “Login” button.
After logging in:
- Check the Terms & Conditions checkbox.
- Click “Continue to Payment”.
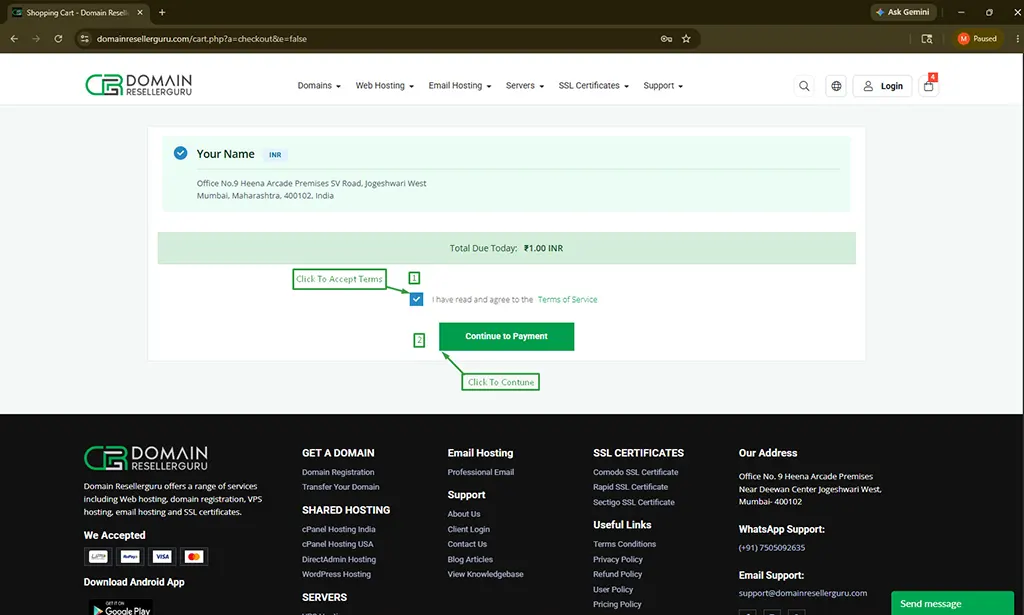
Step 8 — Proceed to Payment
Click the “Continue to Payment” button to proceed to the payment page.
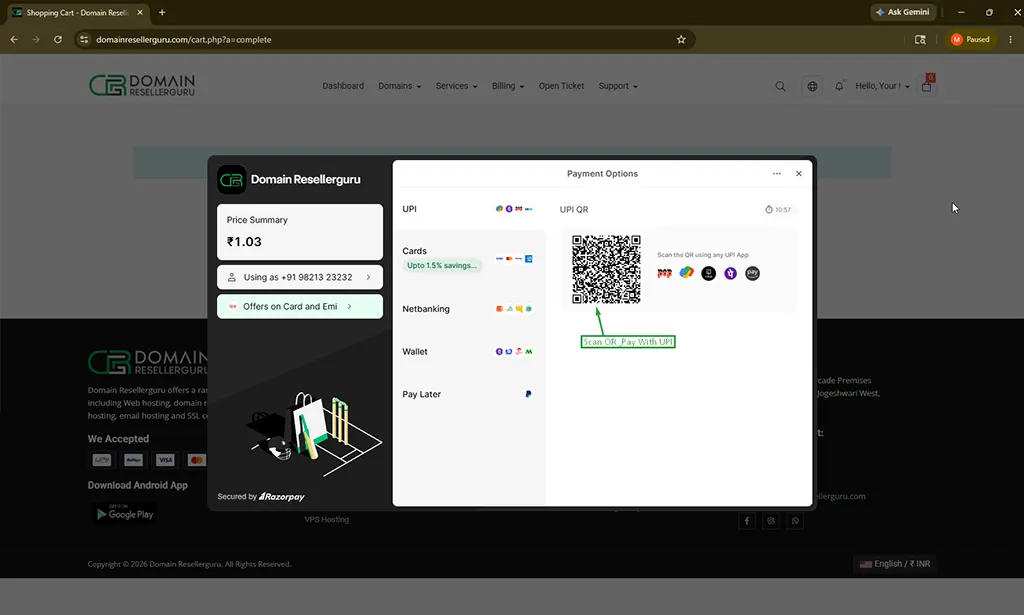
Step 9 — Complete Your Payment For Domain Registration
Scan the QR code or choose your preferred payment method, such as:
- Card
- Net Banking
- UPI
Then complete the payment process.
Step 10 — Payment Confirmation
Once the payment is completed successfully, a confirmation message will appear on the screen
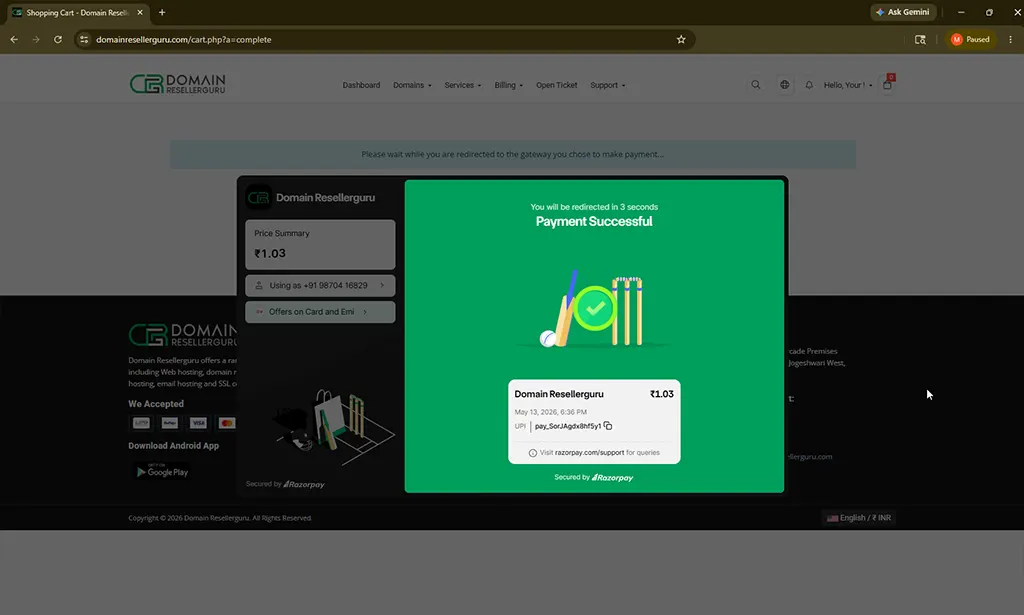
Step 11 — Payment Successful
After successful payment, you will be redirected to the Paid Invoice page.
Here you can:
- Check the invoice status as “Paid”
- Download the invoice
- Print the invoice
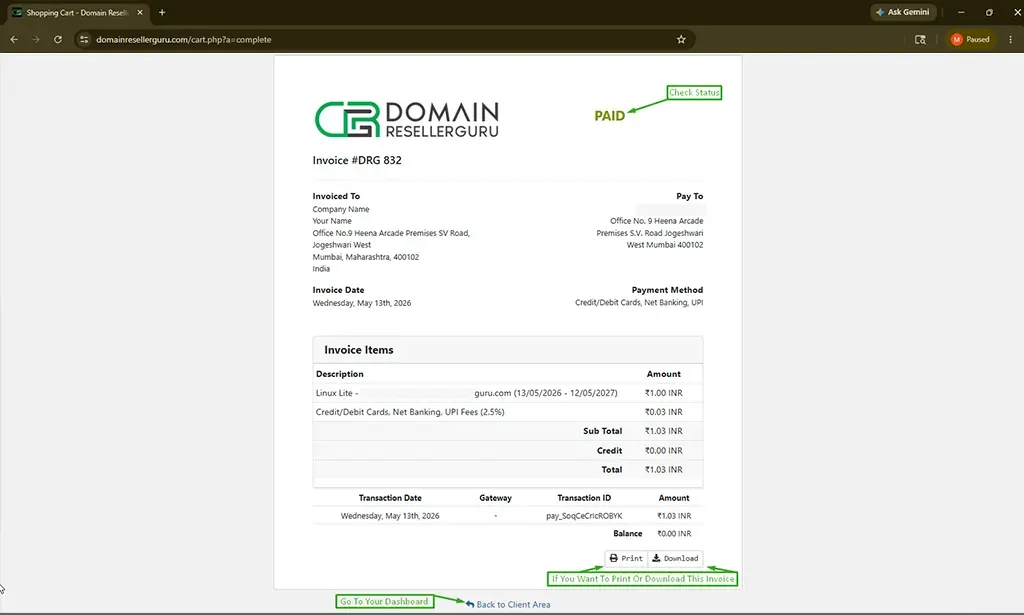
To access your dashboard, click the “Back to Client Area” button available at the bottom of the page.
You will also receive a confirmation email shortly with your order and account details.